Following on from deferred rendering, here’s how we added ambient occlusion / indirect illumination to Frameranger.
Baking ambient occlusion was standard practice in our demos for some time now. You make the scene, go into Lightwave and hit the big red button called “bake”, and it comes back a bit later with something nice. Well it’s a bit more complex than that, but you get the point. However, our scenes in frameranger were a) numerous, b) on the large side and c) full of dynamic stuff. Which means that a) there’ll be a lot of lightmap textures, b) the light map textures will either be massive or look shit (or both), and c) the lightmaps won’t work anyway because most of the geometry doesn’t exist in Lightwave in the first place (or it’s moving). Oh, and there’s a 64mb file size limit in the demo competition at Assembly and most other demo competitions – ridiculous given the amount of memory and bandwidth we have nowadays, but a rule’s a rule. So it soon became apparent that baking ambient occlusion was not going to happen. It would have to either not be done, or be done in a different way. 3D doesn’t look too hot without some form of indirect lighting, so it looked like we’d need something clever to do it in the engine.
SSAO, then?
No. Allow me to now share my dislike of SSAO. I admit it – in the past I might have evangelised about it at some point in a conference talk or sample application and I’ve even used it in a couple of demos. Back in 2007 when I first started using it it seemed all cool and novel, like a magic silver bullet for a very difficult and long-standing problem. But it’s now 2009, for the last couple of years every other “my first game engine” image of the day on gamedev.net has managed an even worse bastardisation of the effect since the last one. The “SSAO look” has become something you can spot a mile off.
Let’s call SSAO what it really is: “crease darkening”. It picks out creases in the z buffer, and darkens them. The size of those creases, the amount of artefacts and the quality of approximation to real AO depends on the implementation, the amount of GPU time you’re willing to sacrifice and the scene itself – I bet we’ve all seen nice images of some object sitting on a plane and neatly getting shaded in a way that looks just like the cleverly constructed reference image from a Mental Ray render. But what they didn’t show was what happens when you put a massive wall by it some way off out of shot, and how the reference image and the SSAO version suddenly look completely different. And that’s the problem with SSAO – it’s great at capturing small crevices, and shit at capturing the large-scale global effects of ambient occlusion. The geometry we had in Frameranger wasn’t very crevicey, and we really needed those large-scale effects.
Having SSAO might be better than not having SSAO. But it is certainly not the final solution to the indirect lighting problem. And don’t even get me started on SSDO for faking radiosity. Sounds great in theory huh? SSAO kindof works, faked colour bleeds kindof works, so if we glue them together we get.. one reason why artists don’t like coders helping out on the visuals.
In short, SSAO went out the window quite early on. We tried it and it didn’t work for the scenes we had. So it was time to come up with something better. Unfortunately, there were no magic solutions – no one technique we could use to say “generate AO for everything”. There are a lot of techniques that can be used to generate ambient occlusion effects in realtime, or at least interactively, and each of them works for a certain case – some only work for small scenes, others for rigid or static objects or a certain rough shape. Until the hardware gets sufficiently powerful to make a silver bullet that kills the problem, we’re stuck with taking all of these methods and working out what we can do for each case – how best to solve the specific problem, the specific scene, at hand.
I tried out a lot of different techniques. Here’s a quick list:
- Ambient occlusion fields
- Analytical methods (the “ao for a sphere” calculation)
- Shadow maps / “loads of lights”
- Ray marching through voxel sets
- Signed distance fields
- Heightmap ray marching
- Hand-made approximations
Now to go through those in a bit more detail. Skip along if you’ve heard it before.
Ambient occlusion fields (as described here).
A method for precomputed, static AO for an object stored in a volume texture, used for casting AO onto other objects. All you need to do per frame is read the volume texture in a deferred pass, and write the value out. It’s a bit like a modern, 3D, accurate version of the blob shadow. It looks nice, but it only works for rigid or static meshes – and those meshes had better be quite small, because the bigger it is the bigger a volume texture you need – for small objects a 32x32x32 or smaller can suffice, but you’d want larger for bigger objects. You also need a bigger map the wider area you want to spread the AO out over. Generating it needs a lengthy precalc or offline storage of the volume texture – you need to cast a bunch of rays at every volume cell to work out the AO, so it’s pretty dog-slow to update in realtime. I experimented with it a while back, and it gives nice soft results, although it doesnt work too well for self-occlusion.
I discarded this one – I was thinking about using it for the car and spider, but it was too slow to generate and not updatable in realtime. I did however use a similar idea for the arcs in the first scene, which I’ll get onto later.
A quick word on the analytical AO techniques – iq covered it here much better than I could, but in short: you can analytically calculate the occlusion effect for a given object, such as a sphere, pretty easily. If only we just had a bunch of spheres. I tried making sphere-tree versions of some of my objects but it looked rubbish, so I moved on.
Now a completely different approach: using shadow mapping for ambient occlusion. I’ve used this idea a few times, first in Fresh! – although as a precalc. It works something like this: ambient occlusion is meant to be “the amount of ambient / sky light which reaches the point” – so the easiest way to calculate that is to cast a load of rays out from the point and see how many don’t hit anything. In GPU land, where we presently reside, you render the scene from your point with a 180 degree FOV (or near to it) to a small buffer and see how many of the pixels don’t get filled. But that implies that to generate a 1024×1024 lightmap you’d need to render the scene about a million times, which is insane. So instead of that we can flip the problem on it’s head. Render the scene from the outside in, using fake lights and rendering to shadow maps, a few hundred times. Then apply the lights / shadow maps as usual to each pixel in the lightmap, and sum up how many of the lights each pixel was in shadow for. That means you only need to render the scene a few hundred times instead of a million – which is a great optimisation in my book. I wish I thought of this first, cos it’s clever, but I didn’t.
For realtime, rendering the scene a few hundred times still sounds pretty bad. If you really cut it down you could get away with around 50-100 passes, render depth only with low resolution geometry – and now we’re almost approaching something that could actually run. In fact I used this in realtime in a 4k called Glitterati back in 2006, and we’ve got a lot more GPU power nowadays.
For my new deferred implementation I wanted to up the speed and the quality. The main optimisation to be able to cache the results between frames – after all, for relatively static scenes the ambient occlusion doesn’t change very much from frame to frame – and to be able to use less shadow map passes per frame but giving the effect of more passes to increase the quality.


The way I did this was to limit the effect to a grid. This effect only works on a limited area anyway as it’s using shadow maps – which are limited in the size they can work on without the aliasing becoming too much of an issue – so gridding it didn’t hurt too much. I created a 3D grid of points which was something like 256x16x256 – much larger in X and Z than Y, which fit the scenes at hand quite well. This mapped to a number of slices of 2D 256×256 textures, and I used 4 channels to store 4 Y slices per 2D slice. This gave me a format which was quite easy to render to and sample with flitering. To render to it, I simply worked out the world position per pixel in the slice texture, sampled all the shadow maps for that position and averaged the results.
I sampled from it using my deferred normal and depth buffers, by working out which 2D position to sample from per pixel and processed several values in a kernel around it. I used the normal and distance from my deferred position to weight the samples, so they had a directional element to them.
I also wanted to avoid having to re-render all the shadow maps and sample from every frame. This turned out to be quite easy – I had a rolling buffer of shadow maps packed onto a 2D slice texture – fortunately they didn’t need to be high resolution. In total I had 64 shadow maps of 256×256 each packed onto a single 2048×2048 texture in an 8×8 arrangement. I re-rendered a number of shadow maps each frame. The grid was only updated using the re-rendered shadow maps like with a rolling sum – so first I subtracted the effect of the previous data I had for the shadow maps, and then I re-rendered them and added the new effects back in. Of course, the problem was that there was a lag when things moved, as the shadow maps updated over several frames to reflect the changes, but it meant that I could compromise speed for update rate. It proved very effective for background geometry as a lightmap replacement.

I tried it out on the city in Frameranger. The main problem is the speed/memory vs quality trade-off – for the size of the scene, it needed bigger shadow maps and a bigger grid, and the quality just wasn’t good enough with acceptable performance. Works well with a smaller scene though.
Raytracing voxels
Going back to “ambient occlusion as a ray tracing problem” again – wouldn’t it be clever to make an easily raytracable version of my geometry, then cast a load of rays at it and see how many don’t hit anything? “Easily raytracable” on a GPU for arbitrary geometry probably means “voxels in a volume texture”. And, as we demo sceners have got to know well recently, an easy way to raytrace a voxel field is to convert it into a signed distance field and then ray march through it with sphere marching – it greatly reduces the number of samples on the ray march that you need to take, potentially skipping large (empty) parts of the field and getting to the answer quickly. Given that AO likes a bit of noise – ironically although it looks “worse” it makes it look more like a render, and therefore more believeable and “better” – you could spread the rays randomly and get away with quite few per pixel. Combined with distance field tracing it might come up with something sensible performance-wise.
I did try this approach out briefly, but it just wasn’t quite fast enough (or good looking enough at acceptable speed). But then I remembered an old talk from Alex Evans at Siggraph. It turns out that signed distance fields have a useful fringe benefit – if you take a few samples from them and perform some dirty function on the results, the result can look a lot like ambient occlusion. It’s quite efficient, and a lot of 4k intros have been using the approach recently to approximate ambient occlusion using signed distance fields. Iniqo Quilez talks about this in one of his presentations on distance field raytracing.
The main difficulty with this approach was that my scene did not currently exist as a distance field. Or as voxels in a volume texture. It was a bunch of polygons. So, how do you convert a mesh to a signed distance field? Option 1: compute the closest distance to triangle for all the triangles, and take the closest result. Option 2: voxelise the mesh and convert it to a signed distance field. I used both approaches. I wanted to do it on the GPU for speed, and so I rendered to a volume slice map – a 2D render target containing the slices of a 3D texture laid out in sequence.
The first method I used for offline computation, and only for static meshes – although it was still done on the GPU; the pixel shader for closest distance from point to triangle for a given triangle isn’t too difficult to do, and it can be optimised (I used an octree to reduce the areas where I computed the actual result) but the time to compute for a reasonably serious triangle mesh was too long for real time.
The second method I solved by rendering the object’s depth to the 6 views of a cube map around the object, from the outside pointing in. Then I performed a slightly dubious process whereby I try and work out the closest distance to the surface by something close to guesswork. It’s like this: given a 3D point inside the cube, sample the depths for that point from the 6 faces of the cubemap. This is enough to tell you if the point is inside the object, and get the closest of the 6 distances to the point – giving you a signed distance. Of course one sample isn’t enough to handle more than the simplest shapes, so you actually do a kernel around the point, check the different results and pick the closest from that. If this was a research paper I’d do a diagram. Nevermind. This solution gives good results for convex shapes, and pretty decent results for any shape where you don’t have completely inaccessible points from an exterior viewpoint – and it runs realtime, so I could use it to work with animated objects. Unfortunately the “signed distance” it gives isn’t exactly the closest possible result – more of a “reasonable guess”.
This problem was a pain to solve, but worth it. It opened a few doors for implementations of other effects like CSG, and for using meshes as inputs to fluid dynamics solvers working on level sets. It worked alright for small objects like the car, but had no chance on something like the city – it relied on the resolution of the volume texture, and would need a massive one to handle the city.
The ambient occlusion result it gave was alright for the polygonal objects I tried it on, but I found better and less memory/computation heavy solutions. The really good application of this technique came along later when I was working with the aforementioned liquid effects using level sets. See, in that case I already *had* a signed distance field that I was using to raytrace the effect in the first place – I didn’t have to mess around and generate one. So I simply took that as an input and used my already-existing ambient occlusion code to render AO for it. And hey, it worked!

This was great for the fluid dynamics scenes, but it was overkill for handling things like the car. So I simplified it..
I’m not completely proud of this, but here goes: the AO solution for the car and the spider in the end was basically a glorified .. blob shadow. A fancy one updated in realtime and with some additional terms and trickery, but still essentially a blob shadow. And why not? Essentially what I had to produce, when you break it down, was what looked like the ambient occlusion effect of the car on the ground – which is usually some variation on a flat plane. Which is a pretty good fit for a blob shadow.
So I rendered the object from above and stored the depth value (so, the height value) in a 2D render target. Then I sampled that by using the GBuffer depth and normal values, projecting the derived world space position into the heightmap’s space, reading the height value from the map and doing some monkeying around with it to create a darkness value based on the distance between the heightmap’s position and the read position – so the value got darker as they got closer together. I took multiple samples with a randomly rotated poission disc, and calculated a blurred/softened result with that. In a way it was a bit like that ATI DOF technique, actually. I blurred the blob heightmap as well, because well – it made it look better. If you’re faking anyway, why stop? And the results were pretty good! It did the job it was required to do neatly and efficiently – and it was easy to combine multiple blob shadows because they were applied in the deferred render / lighting stage, so I could just render them in screen space and blend them together.

If there’s a lesson there, it’s that you shouldn’t discard simple, old-fashioned techniques just because they’re simple and old-fashioned. Sometimes you can get more joy and much better visual results from combining a bunch of simpler techniques in a clever way than you can from trying to find one magic super-technique which handles everything.
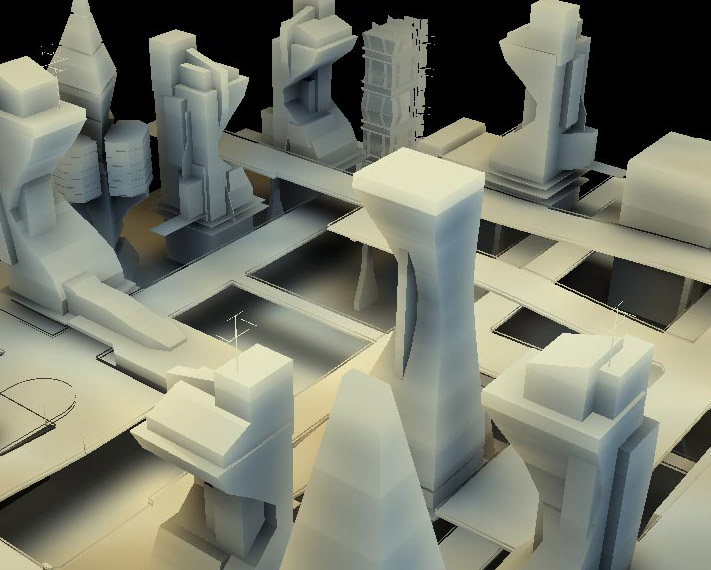
But I still needed a solution for the city / environment. There was an effect I came up with a couple of years ago but never used in a demo which calculated ambient occlusion in realtime for a very specific case: a heightfield (heightmap) rendered as boxes. This is getting back to the idea of raytracing ambient occlusion again – the trick is, as with the other cases, to simplify the representation of the stuff to render to get it into some form that you can raytrace through easily. In this case, the representation is a heightmap, which can be raytraced efficiently by raymarching through it in 2D. You project your world-space position into the heightmap’s space, then march through the heightmap in the ray’s direction, and at each point you compare your ray’s height against the heightmap’s height. The simple way is to just compare and see when the height of the ray is below the height of the heightmap, but you can do a bit of maths with the two values instead and get a better result for occlusion. Finally, return the total occlusion for all the rays you cast for the pixel.
Cutting out one axis means you don’t need as many rays per pixel, and I could get good results with casting only 5-10 rays (spread with noise) per pixel and with only around 8 march steps per ray. i.e. the kind of figures that can actually work in realtime.

Naturally it works for boxes because you just render a box per pixel in the heightmap, and the heightmap is a perfect fit to the boxes: you’ve got a 2D and 3D representation of the same thing and you don’t lose any information between them. But can it be stretched further? Why stop at boxes? Why not render any scene you like to a heightmap, and use that heightmap to raytrace the ambient occlusion for that scene? Of course, the quality is going to depend on how well a heightmap can approximate the scene – if there are a lot of overlaps, holes and interior details it’ll start to break down. But how much does it matter?

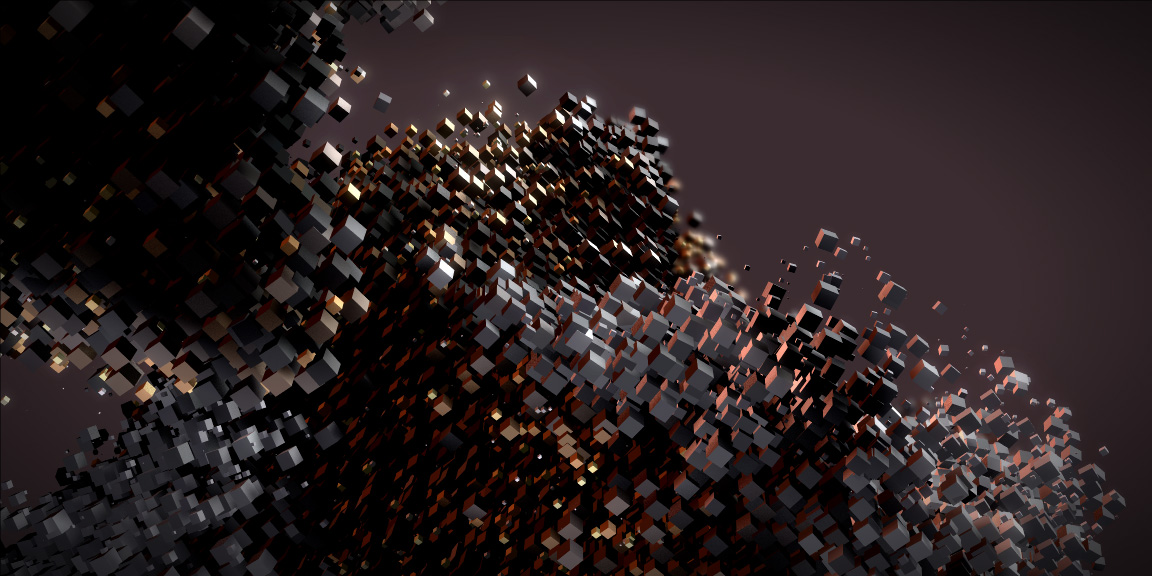
It turns out that for the city, it didnt matter that much at all. A city can map quite well to a heightmap superficially – buildings and roads and so on. The great thing about it is that it efficently captured the larger-scale occlusion – precisely the stuff that SSAO lost – without rendering a huge amount of stuff every frame. It just needed the heightmap and the rays, which were cast off the GBuffer. All the overlapping stuff, bridges etc, didn’t work perfectly of course, but hey – who gives a shit? It looked good! One way this could be used is to bake the local AO for the buildings themselves – i.e. the windows of a building on that building’s walls – and blend it with this technique used for the global AO.

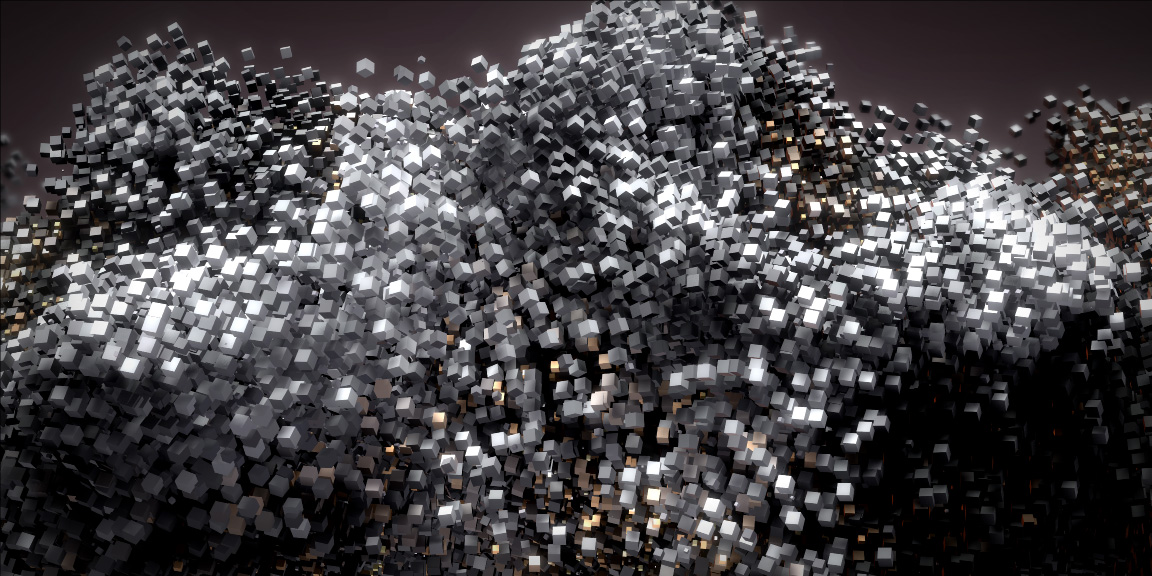
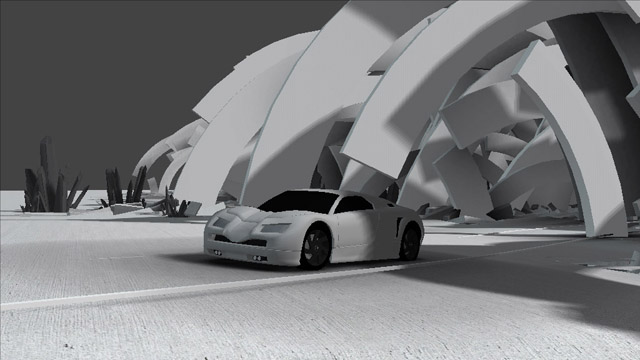
One final thing remained. The first scene with the wave of arcs needed a solution and none of the methods worked well. It was fully dynamic – the geometry was procedural and animated; there was loads of arcs; the scene covered a lot of ground; and the ambient occlusion was absolutely key to the look – it would look flat and lifeless without it. Quite a challenge.
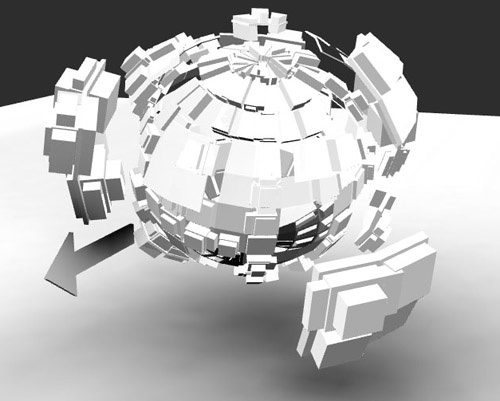
After trying out numerous things, I came up with a solution that was completely specific (read: hardcoded) to the scene in question. I knew that I was dealing with an object – an arc – that could be defined easily and mathematically, and that I had to deal with a large number of them (hundreds) but that their movement pattern was procedural, they only moved in Z and rotated, they were rotating centering on Y=0, and each occupied it’s own unique space in the X axis. I needed to cast AO from each arc onto the other arcs, and also on the ground and any other objects around (e.g. the car) – but the range of the AO effect around an arc could be limited.
First, I came up with a solution to generate the occlusion effect for one arc on any given point. Initially I defined it mathematically but in the end I just made a 2D texture which was the result of projecting the arc side-on and blurring it – my 2d “arc AO map”. In the shader I projected the world space point into “arc space” and sampled the arc AO map, and combined that with a falloff term using the distance to the arc’s major plane (and some other dirty bits of maths to beautify it). That gave me a nice AO shape for one arc.

Then, to solve it for ALL the arcs in the scene, I created a 1d lookup texture which gave me some information about each arc – it’s position, rotation, size and so on – packed into 4 channels. I defined the arcs and the lookup texture in such a way that they were sorted in X – so I could project my world space position into “arc lookup texture space”, and I’d instantly have the closest arc in X; I could step back and forward through the texture to find the neighbours. So my solution was simple: take N samples from the 1d lookup texture around my point; calculate the AO for each arc it defined; accumulate the AO using some dirty blend function; and output the value. By changing N I could trade off performance and quality. It worked great!
I think that last technique sums up the point I’m trying to get across. Generating complex rendering effects like ambient occlusion in realtime for arbitrary scenes with loads of animation that are completely beyond your control is very difficult – a single technique that works great for anything just doesnt really exist. But how many scenes are you working with that are really like that? I had a scene which, at first look, seemed to be impossible to generate good quality ambient occlusion for in real time. By breaking it down, working out ways to approximate it and mixing and matching techniques, it’s often possible to find that solution. If you know you’re only dealing with cubes or you can define it mathematically, if you know your scene is basically all sitting in a single plane, or if there are small static pieces you can bake – e.g. the local AO for a car – then exploit those things. Use all the knowledge you can to break the scene down into pieces that you can handle.
Deferred rendering is a really great help for this because it makes applying all those separate pieces very easy – you can just make a screen-sized buffer, render the different AO elements seperately sampling from the GBuffers for position, normal and object ID data, and blend the different AO elements into that screen-sized AO buffer. Then use that AO buffer as part of your lighting equations, and you’re golden.
It can be done.
It’s just a bloody pain.
But it’s worth it.