youtube capped.tv video download pouet
Anyone remember what happened this easter weekend? I’m a bit hazy about it myself – because I was in Germany living it up at the last ever Breakpoint. A party / festival that’s been running on the easter weekend for the past 8 years in Bingen am Rhein, it was a unique gathering of 1000+ creative and technical types who go there to show their work or see what the others have done, but stay for the massive, massive party. I can’t overstate how much I’ve enjoyed it over the past few years. The atmosphere is unique – it’s amazing to see the enthusiasm everyone there had just for being part of it.
So much has happened to me personally at that event on previous occasions: hotel food fights; TV appearances I can’t remotely remember; big-screen and stage appearances I’ll always remember; appalling hung over football performances; all-nighters working in the freezing cold, where you had to get a coffee just to hold it; close brushes with hospitalisation; and I never even got thrown out once! (I was “helped out” once though. Cheers Docd!) My record of actually getting something finished for it is patchy; we have won there before, but most years we either end up working all weekend in the hotel to just make the deadline, or giving up immediately and going on a massive bender instead – because the party was too much fun to miss. But seeing as it was the last one ever, we thought we owed it to get something done and support the event. And to actually get it done beforehand. And then go on that massive bender I was talking about.
A couple of months ago we started thinking about what we could do in the time available. Frameranger was our last big piece – a blockbuster, the kind of piece you go into a competition with being pretty confident you’re going to win – but that took far too much time, effort and pain to want to repeat in a hurry. Besides, one problem with Breakpoint is Farbrausch – they co-organise Breakpoint, and it was very likely they were going to show up with another massive production like Debris, which effectively defined the scene in 2007 and who’s influence still ripples across it. Without 6 moths or a year to work on something we probably wouldn’t be able to compete with them if they decided to push something big out. We also realised that we didn’t actually want to compete: it would be better to make something that we liked, that was enjoyable to produce, that had a bit more depth to it, showed more maturity, and that perhaps had some more relevance outside of the scene than the big multi-part spectacular we could make that might win. So, there and then we gave up on winning. That was actually quite liberating, and we got on with making it.

First we tried to source a soundtrack. Our first idea was to try and chance it, and contact a major label we admired and asked them to use a certain track we liked. Unfortunately they never even bothered to reply, so we started talking to some musician friends of ours to try and sort something out. They showed us a big load of material that they had been working on and we picked something out, and did a great job fixing it up. Result – we were hooked up with the ideal soundtrack from day one and could design the whole piece around it.
Note: since release, some copyright issues have come to light with the soundtrack due to the large volume of material sampled from one source: “Queen of the Universe” by Socrates. This didn’t get credited in the original release of the production because of a misunderstanding between the musicians and the artists; we’re working to resolve it ASAP.
We decided early on that the approach we should take with the visuals was to try and do everything with particles using a developed version of the particle system from Blunderbuss. It meant we had the ability to make something much more organic and flowing – every part of the screen could be moving all the time, and it would give it an abstract element that’s hard to achieve with polygons alone. However, this time we wanted to combine particles with actual graphics and make a full piece with multiple scenes from it.
Usually we develop the tech and the visuals in tandem – and sometimes the tools too – which often causes a lot of problems. The good thing for this project was that for once we actually had most of the core tech done before we started on the visuals. What we had from Blunderbuss gave us the basics – lots of particles, sorted and rendered with shadows, and a few effects like (fake) fluids on top. But it was essentially quite simple – one (point) emitter at a time, affectors affect all the particles, and the affectors and emitters were quite basic in themselves. It worked for that piece but it wasn’t enough for something larger and more complicated. What it lacked was control – we needed to combine multiple emitters, control particle counts per emitter, and add some more advanced features to cope with using meshes and scenes with animation, targeting into other meshes and scenes, more advanced affectors and much more control and quality in the rendering. And to not completely destroy the frame rate on the way.
Particles and meshes
Emitting from meshes was something I’ve already worked out – I have a routine that generates a big texture containing lots of positions spawned at random places on the polygonal surface of the model. This was simply done using random barycentric coordinates on each triangular face of the mesh. The number of random positions per triangle is weighted by the area of the triangle, so the points are evenly spread across the mesh and you get a pretty solid object. On top of this I added support for sampling the model’s material colours, vertex colours and textures and storing those resulting colour values in a texture too.
Adding support for skinned, animated meshes as emitters and targets was more difficult. The first task was to be able to apply skin/bone transforms in pixel shaders to calculate the animated position of the particle representation at the current point in time. That was quite straightforward: I added the skin weights and bone indices as additional textures, then the bone matrices themselves in a dynamic 1d texture which could be looked up by the bone indices. The skinning code was basically a copy-paste from the vertex shader version I already have, reading bone matrices from texture lookups instead of from vertex shader constants. Spawning a particle at this final resulting skinned position worked fine – the spawned particles appeared where the mesh was posed at the current frame. However, it gave an ugly motionblur-esque trail to the movement because the particles didn’t move with the animation – they spawned where the animation posed them and then the affectors (fluid, forces etc) took over.
What I needed was to combine the spawning with an affector step which also moved the particles with the animated pose, by calculating the current position and moving them to it. I had set it up so that each particle had a unique and corresponding entry in the mesh position texture so it was easy to follow which particle was tied to which point on the mesh, so it was also straightforward to add – but it didn’t do the job either, because I’d swapped following the affectors for following the animation. I needed a blend of those two functions which allowed a particle to follow the animation “a certain amount”, and follow the affectors too. That’s where it all starts to get fuzzy – there’s no “right result” for that, so I just had to work on what looked good.
I computed the current and previous frame’s skinned mesh position for the particle using the skinning routine. Then I had a weighting function based on the particle’s position compared to the mesh position, which also factored in a function based on the life of the particle. I computed that weight for the particle’s previous position and against the previous mesh position, and for the current positions, and picked the greater of the two weights; then I used that weight to blend between the particle’s current position and the current mesh position. The result was that the particle was able to become more affected by the mesh as it got closer to it, until it eventually “stuck” to the mesh and followed it through the animation – until it got towards the end of its life, when it stops being affected as much and gradually falls away from the anim (under control of other affectors).

Being able to emit from one mesh wasn’t good enough – we wanted to throw a whole Lightwave scene at it with multiple objects and animation and even modifiers like Fertilizer (making meshes appear to grow in over time) and animated visibility, and it would figure it out. This just meant that we had to combine all the meshes into one big soup when generating the particles – as long as we kept the object ID per particle in the texture, it was possible to match up the particle to information about the source mesh – transforms, visibility – stored in 1d texture lookup tables, and perform the necessary processing in the pixel shader.
Multiple emitters and materials
Part of the requirement for building a more complex scene was that we had more than one mesh / scene emitting particles at once. The naive solution was to just add more particle systems, but – apart from the performance implications – this had a fundamental flaw: the particles weren’t in the same render targets anymore so they didn’t sort against each other. In some places this was not a problem – it was an easy way to solve e.g. the background / sky particles – but it wasn’t sufficient for a complex scene. We needed to be able to emit from multiple emitters and share the same render targets. So I assigned each emitter a scissor region dynamically which controlled which part of the spawn information targets they could write to, and in turn which particles were spawned from each emitter. I also preserved the ID of the emitter which spawned a particle in the particle GBuffers.
Those particle GBuffers are starting to look more and more like a deferred renderer. The emitter index can be used to access all sorts of things that can now be controlled per emitter rather than globally – e.g. material colour, diffuse, ambient, particle size and so on – just like we had in the deferred renderer using a material index or object index. We can also use the emitter index to look up a table of transforms – so we can choose to move the particles with the emitter they came from.
Screen-space emitters
The particle system started to look increasingly like a deferred renderer, but what about that deferred renderer we had for rendering polygons? It’s not producing anything that makes it to the final render in the demo, but it still has a role. The GBuffers produced when rendering solid objects are now used to emit particles from. The depth buffer can be used to reconstruct the world position of a pixel on screen; the colour buffer provides the base material / texture colour; and we can even run the usual lighting passes and post-fx and obtain a buffer of lit, shaded pixels as would be rendered to the final screen. Most of the background scenes were rendered with lighting and SSAO before the particles took on the colour; they were then lit additionally by the particle lighting and shadowing.
This gives you something that’s 3d-in-2d – 2.5d? – so it isn’t as solid as emitting in 3d from a mesh, but it has that advantage of looking much more solid (from the initial perspective it was emitted from) with far fewer particles than when emitting from a mesh.
A side issue was how to make affectors override other affectors, given that they only produce a velocity buffer. That was quite simple – I sorted them using a controllable key and changed the blend mode. Whereas most affectors (velocity, fluid) blend additively, certain affectors (mesh / image attractors) render towards the end of the list and blend linearly – so they override the motions of the additive affectors but blend by their affecting weight. We also wanted to be able to tie emitters only to certain affectors, and this was handled again with a 1d lookup table on emitter index.
Another thing we wanted was to be able to keyframe the effect of an affector on a particle, and other properties of a particle, over the particle’s life time. Given everything was done on the GPU and needed to be efficient, arbitrary keyframe data was never going to be practical – so we used a simple approximation that still gave us control: we attached 1D bezier curves for many properties. They can be evaluated very efficiently in a shader and they still give a decent amount of control.
We added a few new affectors to the engine; not least was proper fluid dynamics support. I’ve had GPU versions of 2D and 3D Navier Stokes grid solvers for quite some time, and I tied in the 2D one to drive particles. 2D solvers are very effective in the right use-case, even in a 3D scene: we put them on a plane in 3D space, projected the particles onto that plane and sampled the velocity, and applied a falloff towards the edges of the plane and on the z distance from the plane. This did the job neatly for destroying the moon – the one place we needed “proper fluid dynamics” to make it look good.
Making the demo
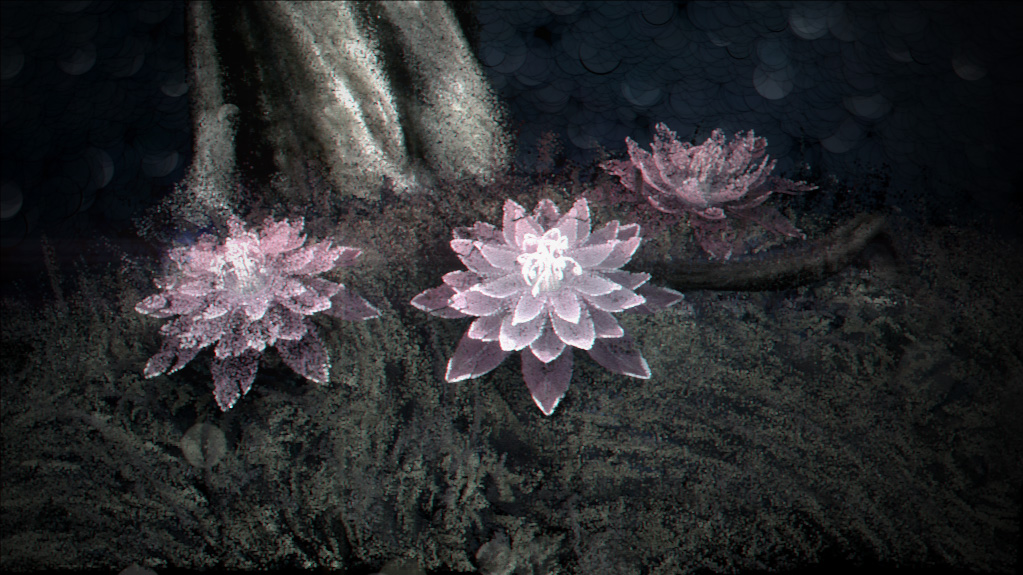
As usual, we were running late. With 4 weeks to go we had a few sketches of ideas and the basis for some scenes, but nothing was too far along. The problem was that we had the music and the technical plan already sorted, but we didn’t have a solid visual concept and story locked down – just a few bits of graphics and some test scenes. The first scene that was laid down was the flowers, which was the first thing we really tried to do with it and existed in some form for several weeks. That helped us nail down our look and flow, and got the tech more or less finalised too. Much of the time was spent with Jani trying out ideas in the tool, and me fixing all the many things that didn’t work and responding to feature requests. With 2 weeks to go we hit the point where we couldn’t go any further without a fully fleshed out concept and we rapidly went through a few revisions – some were quite tight and story-driven and others much more vague. Finally we hit upon something that would flow and we got busy making the extra content.
In the last week things finally started to move. We went into full-on crunch, and worked late into the night every evening. My day started at 6am and ended around 1-2am; living on coffee, squeezing work on the piece into spare minutes at lunchtime or on the train, and then hammering on at it late into the night. It turns out you can adjust quite quickly to less than 5 hours sleep a night as anyone with kids would probably know, but still – apologies to any of my friends or colleages who thought I looked like a big stupid zombie that week. Of course I was totally 100% mentally switched on at all times. Honestly.
The final stages of production on any large project are always a bit painful. The start of a project is a slow, steady high – you have so many possibilities and the deadline where you actually have to deliver something seems so far away, and it’s all about ideas and the fun of trying to implement them. But then there’s a horrible point where you realise you actually have to get something made pretty soon, and you have nothing. From then on it’s a constant stream of ups and downs – something goes right or somebody does something great and you feel like it’s all going to work out, and you’re on a high; then something doesn’t go to plan and you feel like it’s just never going to happen and you’re right back down again. This gets more and more extreme until the end, where you feel this huge wave of relief / joy / anger / exhaustedness (depending on how it ended up). The whole process is a bit like romancing a really high maintainance nymphomaniac. Who’s on uppers. And never stops calling you up during the day. And keeps making you buy her shoes. Highly enjoyable in some ways but you sure suffer for it in others. And somehow you always forget enough of the downsides to want to repeat the experience a few months later.
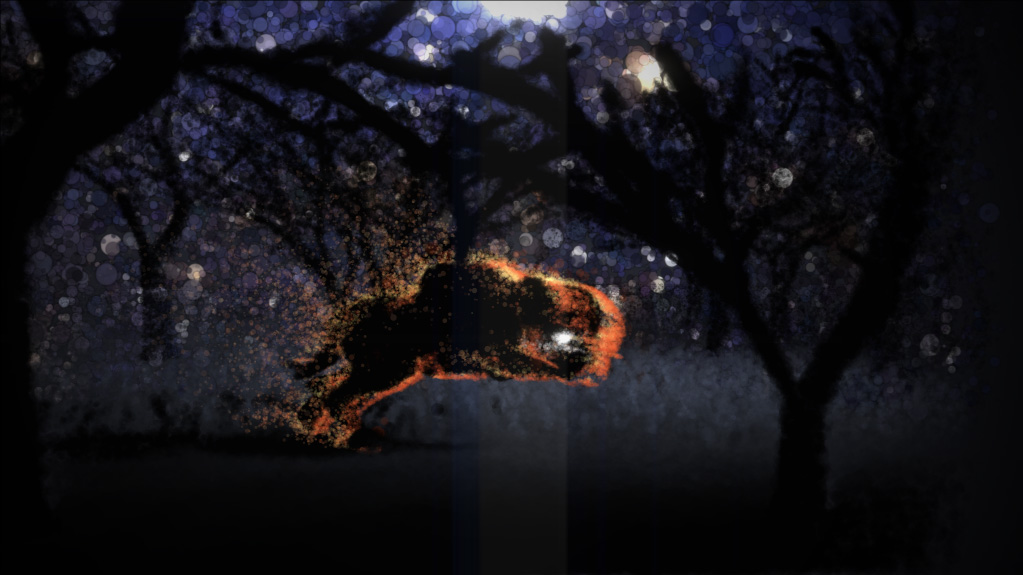
As the week progressed the demo moved forward a lot. The scene with the running people, then the intro and the final part were built in quick succession. The part with the creature in the forest was done last – that was the one part I actually built myself, although Jani did a lot of work on it afterwards to make it into something decent. One advantage with building everything from particles is that it hides a multitude of sins – you don’t need the same level of polish and work on the models and textures as if you were showing them as plain 3D because it becomes so vague when it gets turned to particles anyway. By the end of the week we still seemed a long way from finishing, but somehow on thursday night – after a final almost-all-nighter – it all came together.
It was a very strange situation – we were done early. Let me illustrate the significance of that: that the last production I submitted to Breakpoint was entered during the competition while the 8th entry was currently playing on the big screen. So on past experience I had expected a certain amount of pressure this time. I think I’ve come to enjoy that a little bit over the years – even rely on it – so having almost nothing to do during the event was a little disconcerting. This was the first time I can remember us having time to sit and polish something in years. Naturally I spent most of the time living it up instead, but Jani used the extra time wisely and kept polishing it. New versions appeared over the weekend, each one getting better and better, until Sunday when we packed the final version. Naturally, in keeping with tradition, we did our best to ignore the deadline; shortly after it had passed, and after a kind announcement by KB over the loudspeaker to remind us to enter, I wandered up to the organisers area with the finished piece.
For the whole time we worked on the project, I didn’t expect to win. Although I was really happy how it turned out I thought it could go down like a lead balloon in the competition – it’s slow, abstract and it doesn’t have the crowd-pleasing bling you need to win big. It was a risk for us to do something like this, and I hadn’t thought of it as a competition piece at all. Yet somehow, in a strong field and up against our old german friends from Farbrausch, it won out. I still don’t really understand it, and I received the prize in a bit of a state of shock. I was half thinking “there’s been a mistake; run for it before they change their minds”.
In this scene of ours it’s easy to get obsessed with winning. But if there’s something I’ve learnt from this it’s that it’s so much better just to make something you want to make and are happy with; competition, winning, that’s something that happens sometimes and won’t happen other times, but either way it doesn’t really matter. It’s the icing on the cake if it happens, but the cake still tastes pretty good un-iced. I never liked marzipan anyway.
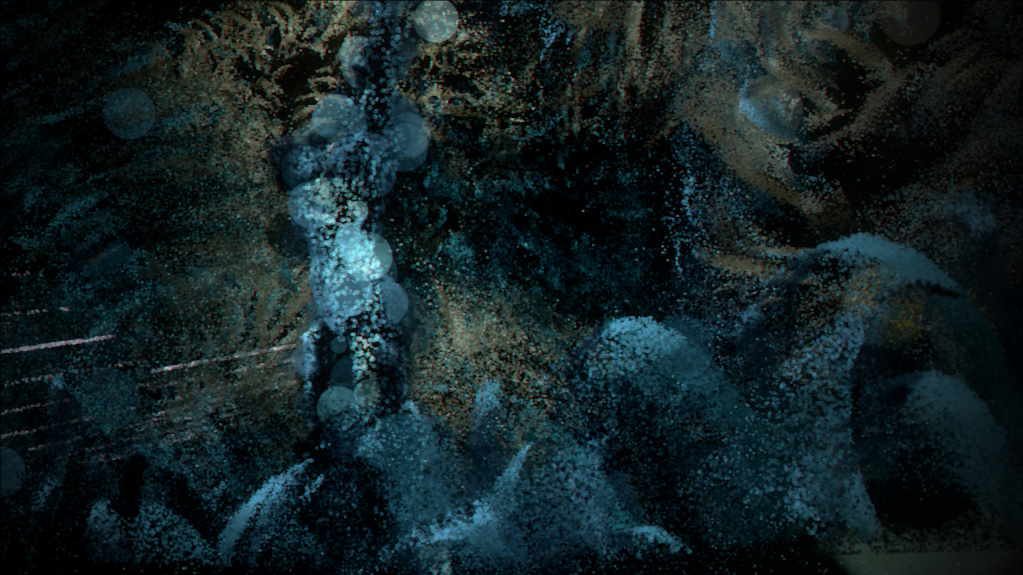
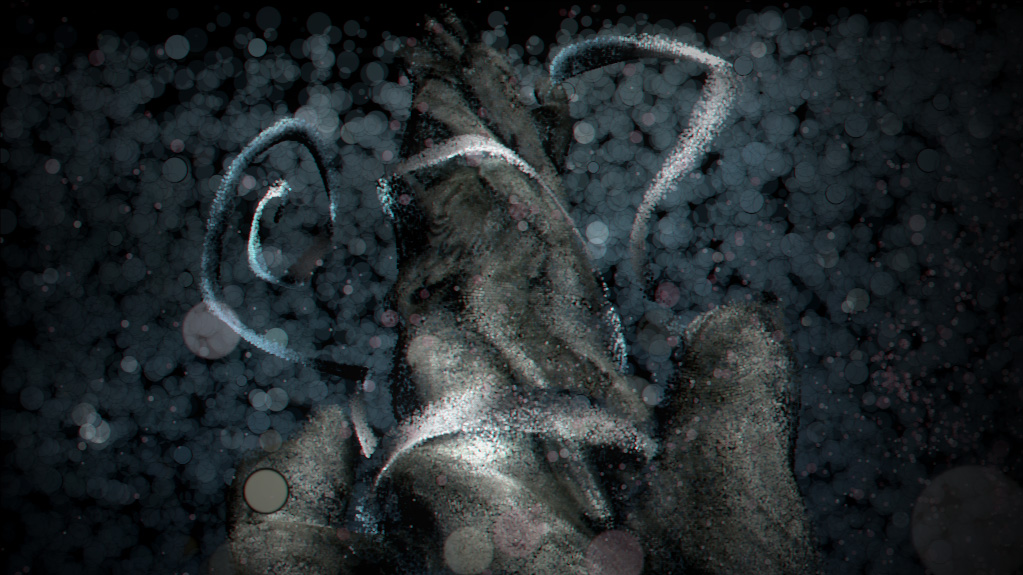
In the end the piece is a series of scenes that were connected by the common motifs that they followed through it, and a loose storyline driven in part by the music. Yep, you got it – I don’t want to explain the content of the piece too much. It’s much better if you draw your own conclusions. Some underlying themes are explored, and you’re welcome to look for them or just take it at face value.
People have said to me, “what’s next, aren’t you bored of particles?” – and I say “no”. Particles/points are a primitive, just like polygons. We haven’t got bored of polygons yet after what – 30 years+? There’s much more that can be done, and we’ve only scratched the surface of what’s possible. New ideas and new hardware make more things happen all the time. We’ll be back. I’m not sure in what form, but watch this space.
There’s been quite a lot of coverage of Breakpoint that we’ve benefited from – including a feature on the German TV channel 3Sat.
By the way, you really do need a good GPU to watch this in realtime. The “detail settings” we had for Blunderbuss to make it watchable on low-end hardware didn’t work here because the scenes were much more complex and we had to tune it for one detail setting – the highest. So you’ll need something top-of-the-line (think Geforce 280) to be able to enjoy it. Don’t worry about running it at less than highest resolution though – you won’t gain much from 1080p over 720p, for example. CPU and memory don’t make much difference, though.
