direct to video

May 8, 2013

real time ray tracing part 2.

Filed under: compute shader, directx 11, ray tracing, realtime rendering — directtovideo @ 1:08 pm

Here’s the science bit. Concentrate..

In the last post I gave an overview of my journey through realtime raytracing and how I ended up with a performant technique that worked in a production setting (well, a demo) and was efficient and useful. Now I’m going go into some more technical details about the approaches I tried and ended up using.

There’s a massive amount of research in raytracing, realtime raytracing, GPU raytracing and so on. Very little of that research ended up with the conclusions I did – discarding the kind of spatial database that’s considered “the way” (i.e. bounding volume hierarchies) and instead using something pretty basic and probably rather inefficient (regular grids / brick maps). I feel that conclusion needs some explanation, so here goes.

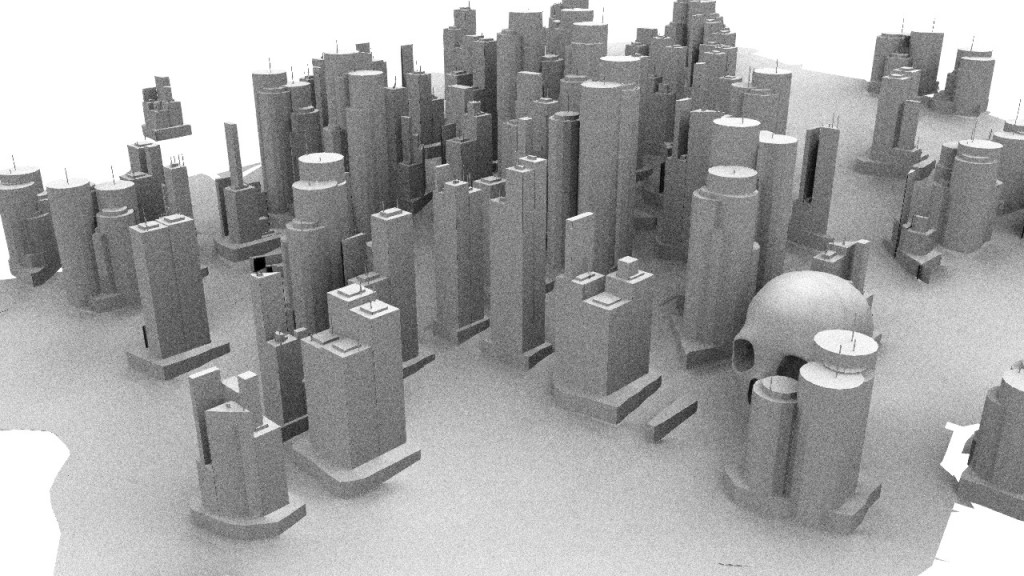
I am not dealing with the “general case” problem that ray tracers usually try and solve. Firstly, my solution was always designed as a hybrid with rasterisation. If a problem can be solved efficiently by rasterisation I don’t need to solve it with ray tracing unless it’s proved that it would work out much better that way. That means I don’t care about ray tracing geometry from the point of view of a pin hole camera: I can just rasterise it instead and render out GBuffers. The only rays I care about are secondary – shadows, occlusion, reflections, refractions – which are much harder to deal with via rasterisation. Secondly I’m able to limit my use case. I don’t need to deal with enormous 10 million poly scenes, patches, heavy instancing and so on. My target is more along the lines of a scene consisting of 50-100,000 triangles – although 5 Faces topped that by some margin in places – and a reasonably enclosed (but not tiny .. see the city in 5 Faces) area. Thirdly I care about data structure generation time. A lot. I have a real time fully dynamic scene which will change every frame, so the data structure needs to be refreshed every frame to keep up. It doesn’t matter if I can trace it in real time if I can’t keep the structure up to date. Forthly I have very limited scope for temporal refinement – I want a dynamic camera and dynamic objects, so stuff can’t just be left to refine for a second or two and keep up. And fifth(ly), I’m willing to sacrifice accuracy & quality for speed, and I’m mainly interested in high value / lower cost effects like reflections rather than a perfect accurate unbiased path trace. So this all forms a slightly different picture to what most ray tracers are aiming for.

Conventional wisdom says a BVH or kD-Tree will be the most efficient data structure for real time ray tracing – and wise men have said that BVH works best for GPU tracing. But let’s take a look at BVH in my scenario:
– BVH is slow to build, at least to build well, and building on GPU is still an open area of research.
– BVH is great at quickly rejecting rays that start at the camera and miss everything. However, I care about secondary rays cast off GBuffers: essentially all my rays start on the surface of a mesh, i.e. at the leaf node of a BVH. I’d need to walk down the BVH all the way to the leaf just to find the cell the ray starts in – let alone where it ends up.
– BVH traversal is not that kind to the current architecture of GPU shaders. You can either implement the traversal using a stack – in which case you need a bunch of groupshared memory in the shader, which hammers occupancy. Using groupshared, beyond a very low limit, is bad news mmkay? All that 64k of memory is shared between everything you have in flight at once. The more you use, the less in flight. If you’re using a load of groupshared to optimise something you better be smart. Smart enough to beat the GPU’s ability to keep a lot of dumb stuff in flight and switch between it. Fortunately you can implement BVH traversal using a branching linked list instead (pass / fail links) and it becomes a stackless BVH, which works without groupshared.
But then you hit the other issue: thread divergence. This is a general problem with SIMD ray tracing on CPU and GPU: if rays executed inside one SIMD take different paths through the structure, their execution diverges. One thread can finish while others continue, and you waste resources. Or, one bad ugly ray ends up taking a very long time and the rest of the threads are idle. Or, you have branches in your code to handle different tree paths, and your threads inside a single wavefront end up hitting different branches continually – i.e. you pay the total cost for all of it. Dynamic branches, conditional loops and so on can seriously hurt efficiency for that reason.
– BVH makes it harder to modify / bend rays in flight. You can’t just keep going where you were in your tree traversal if you modify a ray – you need to go back up to the root to be accurate. Multiple bounces of reflections would mean making new rays.

All this adds up to BVH not being all that good in my scenario.

So, what about a really really dumb solution: storing triangle lists in cells in a regular 3D grid? This is generally considered a terrible structure because:
– You can’t skip free space – you have to step over every cell along the ray to see what it contains; rays take ages to work out they’ve hit nothing. Rays that hit nothing are actually worse than rays that do hit, because they can’t early out.
– You need a high granularity of cells or you end up with too many triangles in each cell to be efficient, but then you end up making the first problem a lot worse (and needing lots of memory etc).

However, it has some clear advantages in my case:
– Ray marching voxels on a GPU is fast. I know because I’ve done it many times before, e.g. for volumetric rendering of smoke. If the voxel field is quite low res – say, 64x64x64 or 128x128x128 – I can march all the way through it in just a few milliseconds.
– I read up on the DDA algorithm so I know how to ray march through the grid properly, i.e. visit every cell along the ray exactly once 🙂
– I can build them really really fast, even with lots of triangles to deal with. To put a triangle mesh into a voxel grid all I have to do is render the mesh with a geometry shader, pass the triangle to each 2D slice it intersects, then use a UAV containing a linked list per cell to push out the triangle index on to the list for each intersected cell.
– If the scene isn’t too high poly and spread out kindly, I don’t have too many triangles per cell so it intersects fast.
– There’s hardly any branches or divergence in the shader except when choosing to check triangles or not. All I’m doing is stepping to next cell, checking contents, tracing triangles if they exist, stepping to next cell. If the ray exits the grid or hits, the thread goes idle. There’s no groupshared memory requirement and low register usage, so lots of wavefronts can be in flight to switch between and eat up cycles when I’m waiting for memory accesses and so on.
– It’s easy to bounce a ray mid-loop. I can just change direction, change DDA coefficients and keep stepping. Indeed it’s an advantage – a ray that bounces 10 times in quick succession can follow more or less the same code path and execution time as a ray that misses and takes a long time to exit. They still both just step, visit cells and intersect triangles; it’s just that one ray hits and bounces too.

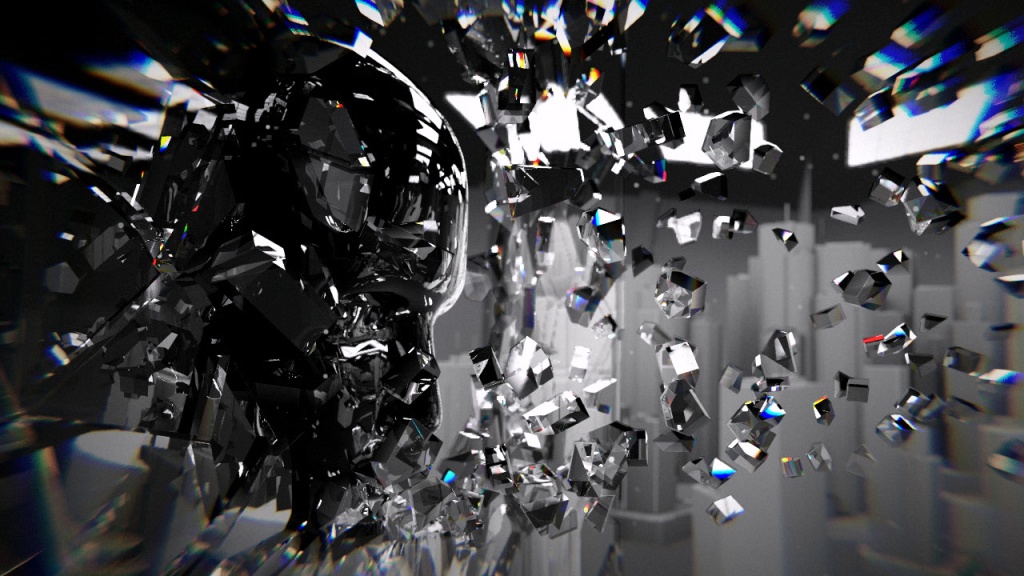
Gratuitous screenshot from 5 Faces

Gratuitous screenshot from 5 Faces

So this super simple, very poor data structure is actually not all that terrible after all. But it still has some major failings. It’s basically hard limited on scene complexity. If I have too large a scene with too many triangles, the grid will either have too many triangles per cell in the areas that are filled, or I’ll have to make the grid too high res. And that burns memory and makes the voxel marching time longer even when nothing is hit. Step in the sparse voxel octree (SVO) and the brick map.

Sparse voxel octrees solve the problem of free space management by a) storing a multi-level octree not a flat grid, and b) only storing child cells when the parent cells are filled. This works out being very space-efficient. However the traversal is quite slow; the shader has to traverse a tree to find any leaf node in the structure, so you end up with a problem not completely unlike BVH tracing. You either traverse the whole structure at every step along the ray, which is slow; or use a stack, which is also slow and makes it hard to e.g. bend the ray in flight. Brick maps however just have two discrete levels: a low level voxel grid, and a high level sparse brick map.

In practice this works out as a complete voxel grid (volume texture) at say 64x64x64 resolution, where each cell contains a uint index. The index either indicates the cell is empty, or it points into a buffer containing the brick data. The brick data is a structured buffer (or volume texture) split into say 8x8x8 cell bricks. The bricks contain uints pointing at triangle linked lists containing the list of triangles in each cell. When traversing this structure you step along the low res voxel grid exactly as for a regular voxel grid; when you encounter a filled cell you read the brick, and step along that instead until you hit a cell with triangles in, and then trace those.

The key advantage over an SVO is that there’s only two levels, so the traversal from the top down to the leaf can be hard coded: you read the low level cell at your point in space, see if it contains a brick, look up the brick and read the brick cell at your point in space. You don’t need to branch into a different block of code when tracing inside a brick either – you just change the distance you step along the ray, and always read the low level cell at every iteration. This makes the shader really simple and with very little divergence.

Brick map generation in 2D

Brick map generation in 2D

Building a brick map works in 3 steps and can be done sparsely, top down:
– Render the geometry to the low res voxel grid. Just mark which cells are filled;
– Run over the whole grid in a post process and allocate bricks to filled low res cells. Store indices in the low res grid in a volume texture
– Render the geometry as if rendering to a high res grid (low res size * brick size); when filling in the grid, first read the low res grid, find the brick, then find the location in the brick and fill in the cell. Use a triangle linked list per cell again. Make sure to update the linked list atomically. 🙂

The voxel filling is done with a geometry shader and pixel shader in my case – it balances workload nicely using the rasteriser, which is quite difficult to do using compute because you have to load balance yourself. I preallocate a brick buffer based on how much of the grid I expect to be filled. In my case I guess at around 10-20%. I usually go for a 64x64x64 low res map and 4x4x4 bricks for an effective resolution of 256x256x256. This is because it worked out as a good balance overall for the scenes; some would have been better at different resolutions, but if I had to manage different allocation sizes I ran into a few little VRAM problems – i.e. running out. The high resolution is important: it means I don’t have too many tris per cell. Typically it took around 2-10 ms to build the brick map per frame for the scenes in 5 Faces – depending on tri count, tris per cell (i.e. contention), tri size etc.

One other thing I should mention: where do the triangles come from? In my scenes the triangles move, but they vary in count per frame too, and can be generated on GPU – e.g. marching cubes – or can be instanced and driven by GPU simulations (e.g. cubes moved around on GPU as fluids). I have a first pass which runs through everything in the scene and “captures” its triangles into a big structured buffer. This works in my ubershader setup and handles skins, deformers, instancing, generated geometry etc. This structured buffer is what is used to generate the brick maps in one single draw call. Naturally you could split it up if you had static and dynamic parts, but in my case the time to generate that buffer was well under 1ms each frame (usually more like 0.3ms).

Key brick map advantages:
– Simple and fast to build, much like a regular voxel grid
– Much more memory-efficient than a regular voxel grid for high resolution grids
– Skips (some) free space
– Efficient, simple shader with no complex tree traversal necessary, and relatively little divergence
– You can find the exact leaf cell any point in space is in in 2 steps – useful for secondary rays
– It’s quite possible to mix dynamic and static content – prebake some of the brick map, update or append dynamic parts
– You can generate the brick map in camera space, world space, a moving grid – doesn’t really matter
– You can easily bend or bounce the ray in flight just like you could with a regular voxel grid. Very important for multi-bounce reflections and refractions. I can limit the shader execution loop by number of cells marched not by number of bounces – so a ray with a lot of quick local bounces can take as long as a ray that doesn’t hit anything and exits.

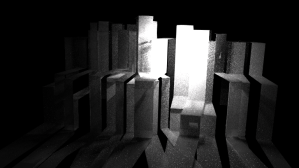
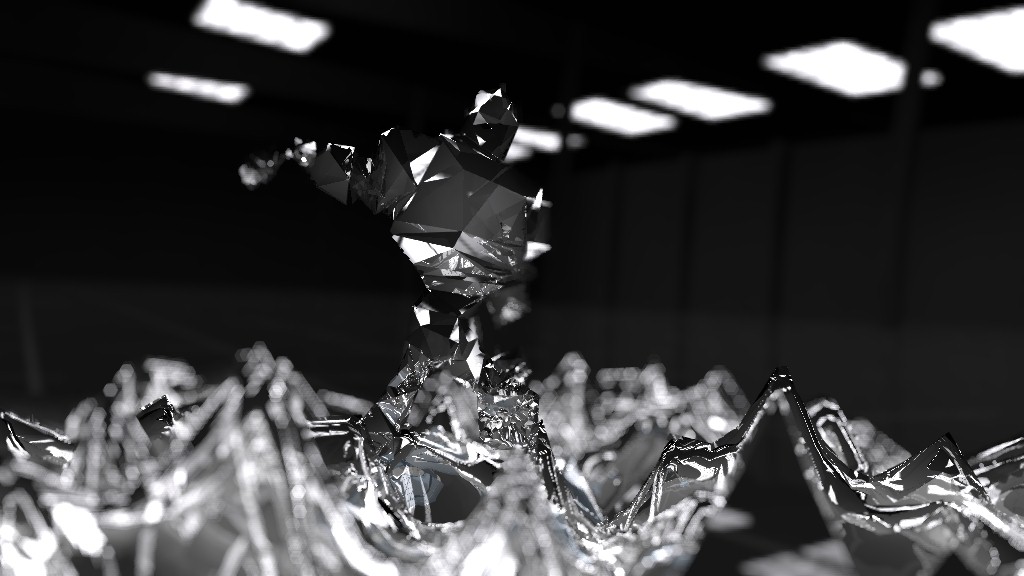
Gratuitous screenshot from 5 Faces

Gratuitous screenshot from 5 Faces

In conclusion: brick maps gave me a fast, efficient way of managing triangles for my real time raytracer which has a very particular use case and set of limitations. I don’t want to handle camera rays, only secondary rays – i.e. all of my rays start already on a surface. I don’t need to handle millions of triangles. I do need to build the structure very quickly and have it completely dynamic and solid. I want to be able to bounce rays. From a shader coding point of view, I want as little divergence as possible and some control over total execution time of a thread.

I don’t see it taking over as the structure used in Octane or Optix any time soon, but for me it definitely worked out.

May 7, 2013

real time ray tracing.

Filed under: compute shader, demoscene, directx 11, ray tracing, realtime rendering — directtovideo @ 4:48 pm

It’s practically a tradition.

New hardware generation, new feature set. Ask the age old question: “is real time ray tracing practical yet?”. No, no it’s not is the answer that comes back every time.

But when I moved to Directx 11 sometime in the second half of 2011 I had the feeling that maybe this time it’d be different and the tide was changing. Ray tracing on GPUs in various forms has become popular and even efficient – be it in terms of signed distance field tracing in demos, sparse voxel octrees in game engines, nice looking WebGL path tracers, or actual proper in-viewport production rendering tracers like Brigade / Octane . So I had to try it.

My experience of ray tracing had been quite limited up til then. I had used signed distance field tracing in a 64k, some primitive intersection checking and metaball tracing for effects, and a simple octree-based voxel tracer, but never written a proper ray tracer to handle big polygonal scenes with a spatial database. So I started from the ground up. It didn’t really help that my experience of DX11 was quite limited too at the time, so the learning curve was steep. My initial goal was to render real time sub surface scattering for a certain particular degenerate case – something that could only be achieved effectively by path tracing – and using polygonal meshes with thin features that could not be represented effectively by distance fields or voxels – they needed triangles. I had a secondary goal too; we are increasingly using the demo tools to render things for offline – i.e. videos – and we wanted to be able to achieve much better render quality in this case, with the kind of lighting and rendering you’d get from using a 3d modelling package. We could do a lot with post processing and antialiasing quality but the lighting was hard limited – we didn’t have a secondary illumination method that worked with everything and gave the quality needed. Being able to raytrace the triangle scenes we were rendering would make this possible – we could then apply all kinds of global illumination techniques to the render. Some of those scenes were generated on GPU so this added an immediate requirement – the tracer should work entirely on GPU.

I started reading the research papers on GPU ray tracing. The major consideration for a triangle ray tracer is the data structure you use to store the triangles; a structure that allows rays to quickly traverse space and determine if, and what, they hit. Timo Aila and Samuli Laine in particular released a load of material on data structures for ray acceleration on GPUs, and they also released some source. This led into my first attempt: implementing a bounding volume hierarchy (BVH) structure. A BVH is a tree of (in thise case) axis aligned bounding boxes. The top level box encloses the entire scene, and at each step down the tree the current box is split in half at a position and axis determined by some heuristic. Then you put the triangles in each half depending on which one they sit inside, then generate two new boxes that actually enclose their triangles. Those boxes contain nodes and you recurse again. BVH building was a mystery to me until I read their stuff and figured out that it’s not actually all that complicated. It’s not all that fast either, though. The algorithm is quite heavyweight so a GPU implementation didn’t look trivial – it had to run on CPU as a precalc and it took its time. That pretty much eliminated the ability to use dynamic scenes. The actual tracer for the BVH was pretty straightforward to implement in pixel or compute shader.

Finally for the first time I could actually ray trace a polygon mesh efficiently and accurately on GPU. This was a big breakthrough – suddenly a lot of things seemed possible. I tried stuff out just to see what could be done, how fast it would run etc. and I quickly came to an annoying conclusion – it wasn’t fast enough. I could trace a camera ray per pixel at the object at a decent resolution in a frame, but if it was meant to bounce or scatter and I tried to handle that it got way too slow. If I spread the work over multiple frames or allowed it seconds to run I could achieve some pretty nice results, though. The advantages of proper ambient occlusion, accurate sharp shadow intersections with no errors or artefacts, soft shadows from area lights and so on were obvious.

An early ambient occlusion ray tracing test

An early ambient occlusion ray tracing test

Unfortunately just being able to ray trace wasn’t enough. To make it useful I needed a lot of rays, and a lot of performance. I spent a month or so working on ways to at first speed up the techniques I was trying to do, then on ways to cache or reduce workload, then on ways to just totally cheat.

Eventually I had a solution where every face on every mesh was assigned a portion of a global lightmap, and all the bounce results were cached in a map per bounce index. The lightmaps were intentionally low resolution, meaning fewer rays, and I blurred it regularly to spread out and smooth results. The bounce map was also heavily temporally smoothed over frames. Then for the final ray I traced out at full resolution into the bounce map so I kept some sharpness. It worked..

Multiple-bounce GI using a light map to cache - bounce 1
Multiple-bounce GI using a light map to cache - bounce 2
Multiple-bounce GI using a light map to cache - bounce 3

.. But it wasn’t all that quick, either. It relied heavily on lots of temporal smoothing & reprojection, so if anything moved it took an age to update. However this wasn’t much of a problem because I was using a single BVH built on CPU – i.e. it was completely static. That wasn’t going to do.

At this point I underwent something of a reboot and changed direction completely. Instead of a structure that was quite efficient to trace but slow to build (and only buildable on CPU), I moved to a structure that was as simple to build as I could possibly think of: a voxel grid, where each cell contains a list of triangles that overlap it. Building it was trivial: you can pretty much just render the mesh into the grid and use a UAV to write out the triangle indices of triangles that intersect the voxels they overlapped. Tracing it was trivial too – just ray march the voxels, and if the voxel contains triangles then trace the triangles in it. Naturally this was much less efficient to trace than BVH – you could march over multiple cells that contain the same triangles and had to test them again, and you can’t skip free space at all, you have to trace every voxel. But it meant one important thing: I could ray trace dynamic scenes. It actually worked.

At this point we started work on an ill fated demo for Revision 2012 which pushed this stuff into actual production.

Ray tracing - unreleased Revision demo, 2012

Ray tracing - unreleased Revision demo, 2012


It was here we hit a problem. This stuff was, objectively speaking, pretty slow and not actually that good looking. It was noisy, and we needed loads of temporal smoothing and reprojection so it had to move really slowly to look decent. Clever though it probably was, it wasn’t actually achieving the kind of results that made it stand up well enough on its own to justify the simple scenes we were limited to being able to achieve with it. That’s a hard lesson to learn with effect coding: no matter how clever the technique, how cool the theory, if it looks like a low resolution baked light map but takes 50ms every frame to do then it’s probably not worth doing, and the audience – who naturally finds it a lot harder than the creator of the demo to know what’s going on technically – is never going to “get it” either. As a result production came to a halt and in the end the demo was dropped; we used the violinist and the soundtrack as the intro sequence for Spacecut (1st place at Assembly 2012) instead with an entirely different and much more traditional rendering path.

The work I did on ray tracing still proved useful – we got some new tech out of it, it taught me a lot about compute, DX11 and data structures, and we used the BVH routine for static particle collisions for some time afterwards. I also prototyped some other things like reflections with BVH tracing. And here my ray tracing journey comes to a close.

Ray tracing - unreleased Revision demo, 2012

Ray tracing – unreleased Revision demo, 2012

Ray tracing - unreleased Revision demo, 2012

Ray tracing – unreleased Revision demo, 2012


.. Until the end of 2012.

In the interim I had been working on a lot of techniques involving distance field meshing, fluid dynamics and particle systems, and also volume rendering techniques. Something that always came up was that the techniques typically involved discretising things onto a volume grid – or at least storing lists in a volume grid. The limitation was the resolution of the grid. Too low and it didn’t provide enough detail or had too much in each cell; too high and it ate too much memory and performance. This became a brick wall to making these techniques work.

One day I finally hit on a solution that allowed me to use a sparse grid or octree for these structures. This meant that the grid represented space with a very low resolution volume and then allowed each cell to be subdivided and refined in a tree structure like an octree – but only in the parts of the grid that actually contained stuff. Previously I had considered using these structures but could only build them bottom-up – i.e. start with the highest resolution, generate all the data then optimise into a sparse structure. That didn’t help when it came to trying to build the structure in low memory fast and in realtime – I needed to build it top down, i.e. sparse while generating. This is something I finally figured out, and it proved a solution to a whole bunch of problems.

Around that time I was reading up on sparse voxel octrees and I was wondering if it was actually performant – whether you could use it to ray trace ambient occlusion etc for realtime in a general case. Then I thought – why not put triangles in the leaf nodes so I could trace triangles too? The advantages were clear – fast realtime building times like the old voxel implementation, but with added space skipping when raytraced – and higher resolution grids so the cells contained less triangles. I got it working and started trying some things out. A path tracer, ambient occlusion and so on. Performance was showing a lot more potential. It also worked with any triangle content, including meshes that I generated on GPU – e.g. marching cubes, fluids etc.

At this point I made a decision about design. The last time I tried to use a tracer in a practical application didnt work out because I aimed for something a) too heavy and b) too easy to fake with a lightmap. If I was going to show it it needed to show something that a) couldn’t be done with a lightmap or be baked or faked easily and b) didn’t need loads of rays. So I decided to focus on reflections. Then I added refractions into the mix and started working on rendering some convincing glass. Glass is very hard to render without a raytracer – the light interactions and refraction is really hard to fake. It seemed like a scenario where a raytracer could win out and it’d be obvious it was doing something clever.

Over time, sparse voxel octrees just weren’t giving me the performance I needed when tracing – the traversal of the tree structure was just too slow and complex in the shader – so I ended up rewriting it all and replacing it with a different technique: brick maps. Brick maps are a kindof special case of sparse voxels: you only have 2 levels: a complete low resolution level grid where filled cells contain pointers into an array of bricks. A brick is a small block of high resolution cells, e.g. 8x8x8 cells in a brick. So you have for example a 64x64x64 low res voxel map pointing into 8x8x8 bricks, and you have an effective resolution of 512x512x512 – but stored sparsely so you only need the memory requirements of a small % of the total. The great thing about this is, as well as being fast to build it’s also fast to trace. The shader only has to deal with two levels so it has much less branching and path divergence. This gave me much higher performance – around 2-3x the SVO method in many places. Finally things were getting practical and fast.

I started doing some proper tests. I found that I could take a reasonable scene – e.g. a city of 50,000 triangles – and build the data structure in 3-4 ms, then ray trace reflections in 6 ms. Adding in extra bounces in the reflection code was easy and only pushed the time up to around 10-12 ms. Suddenly I had a technique capable of rendering something that looked impressive – something that wasn’t going to be easily faked. Something that actually looked worth the time and effort it took.

Then I started working heavily on glass. Getting efficient raytracing working was only a small part of the battle; making a good looking glass shader even with the ray tracing working was a feat in itself. It took a whole lot of hacking, approximations and reading of maths to get a result.

The evolution of glass - 1

The evolution of glass – 1

The evolution of glass - 2

The evolution of glass – 2

The evolution of glass - 3

The evolution of glass – 3

The evolution of glass - final

The evolution of glass – final

After at last getting a decent result out of the ray tracer I started working on a demo for Revision 2013. At the time I was also working with Jani on a music video – the tail end of that project – so I left him to work on that and tried to do the demo on my own; sometimes doing something on your own is a valuable experience for yourself, if nothing else. It meant that I basically had no art whatsoever, so I went on the rob – begged stole and borrowed anything I could from my various talented artist friends, and filled in the gaps myself.

I was also, more seriously, completely without a soundtrack. Unfortunately Revision’s rules caused a serious headache: they don’t allow any GEMA-affiliated musicians to compete. GEMA affliated equates to “member of a copyright society” – which ruled out almost all the musicians I am friends with or have worked with before who are actually still active. Gargaj one day suggested to me, “why don’t you just ask this guy”, linking me to Cloudkicker – an amazing indie artist who happily appears to be anti copyright organisations and releases his stuff under “pay what you want”. I mailed him and he gave me the OK. Just hoped he would be OK with the result..

I spent around 3 weeks making and editing content and putting it all together. Making a demo yourself is hard. You’re torn between fixing code bugs or design bugs; making the shaders & effects look good or actually getting content on screen. It proved tough but educational. Using your own tool & engine in anger is always a good exercise, and this time a positive one: it never crashed once (except when I reset the GPU with some shader bug). It was all looking good..

.. until I got to Revision and tried it on the compo PC. I had tested on a high end Radeon and assumed the Geforce 680 in the compo PC would behave similarly. It didn’t. It was about 60% the performance in many places, and had some real problems with fillrate-heavy stuff (the bokeh DOF was slower than the raytracer..). The performance was terrible, and worse – it was erratic. Jumping between 30 and 60 in many places. Thankfully the kind Revision compo organisers (Chaos et al) let me actually sit and work on the compo PC and do my best to cut stuff around until it ran OK, and I frame locked it to 30.

And .. we won! (I was way too hung over to show up to the prize giving though.)

Demo here:

5 Faces by Fairlight feat. CloudKicker
[Youtube]

After Revision I started working on getting the ray tracer working in the viewport, refining on idle. Much more work to do here, but some initial tests with AO showed promise. Watch this space.

AO in viewport - 1 second refine

AO in viewport – 1 second refine

AO in viewport - 10 second refine

AO in viewport – 10 second refine


Create a free website or blog at WordPress.com.